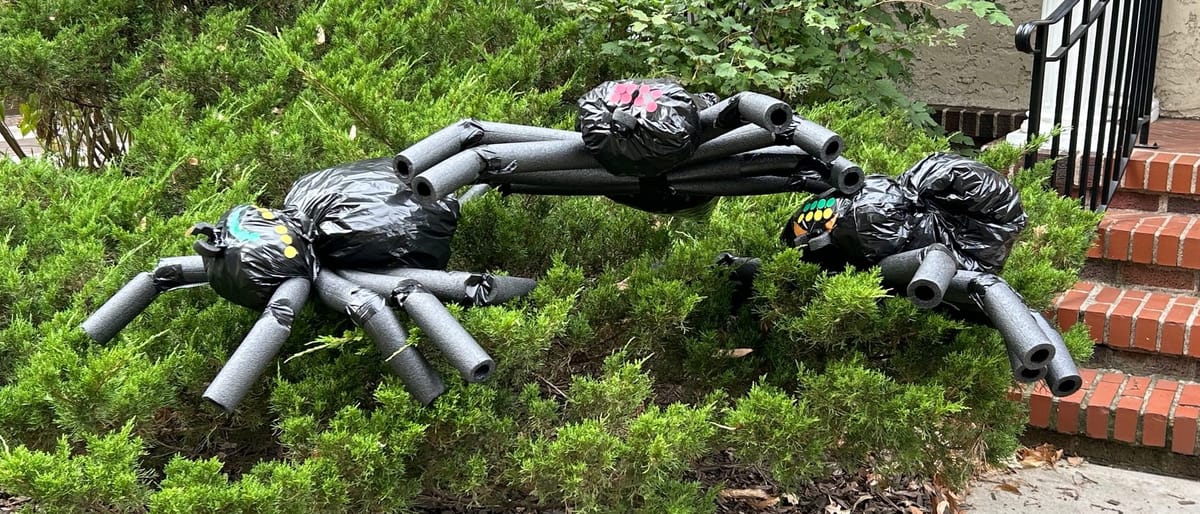
Halloween spider craft
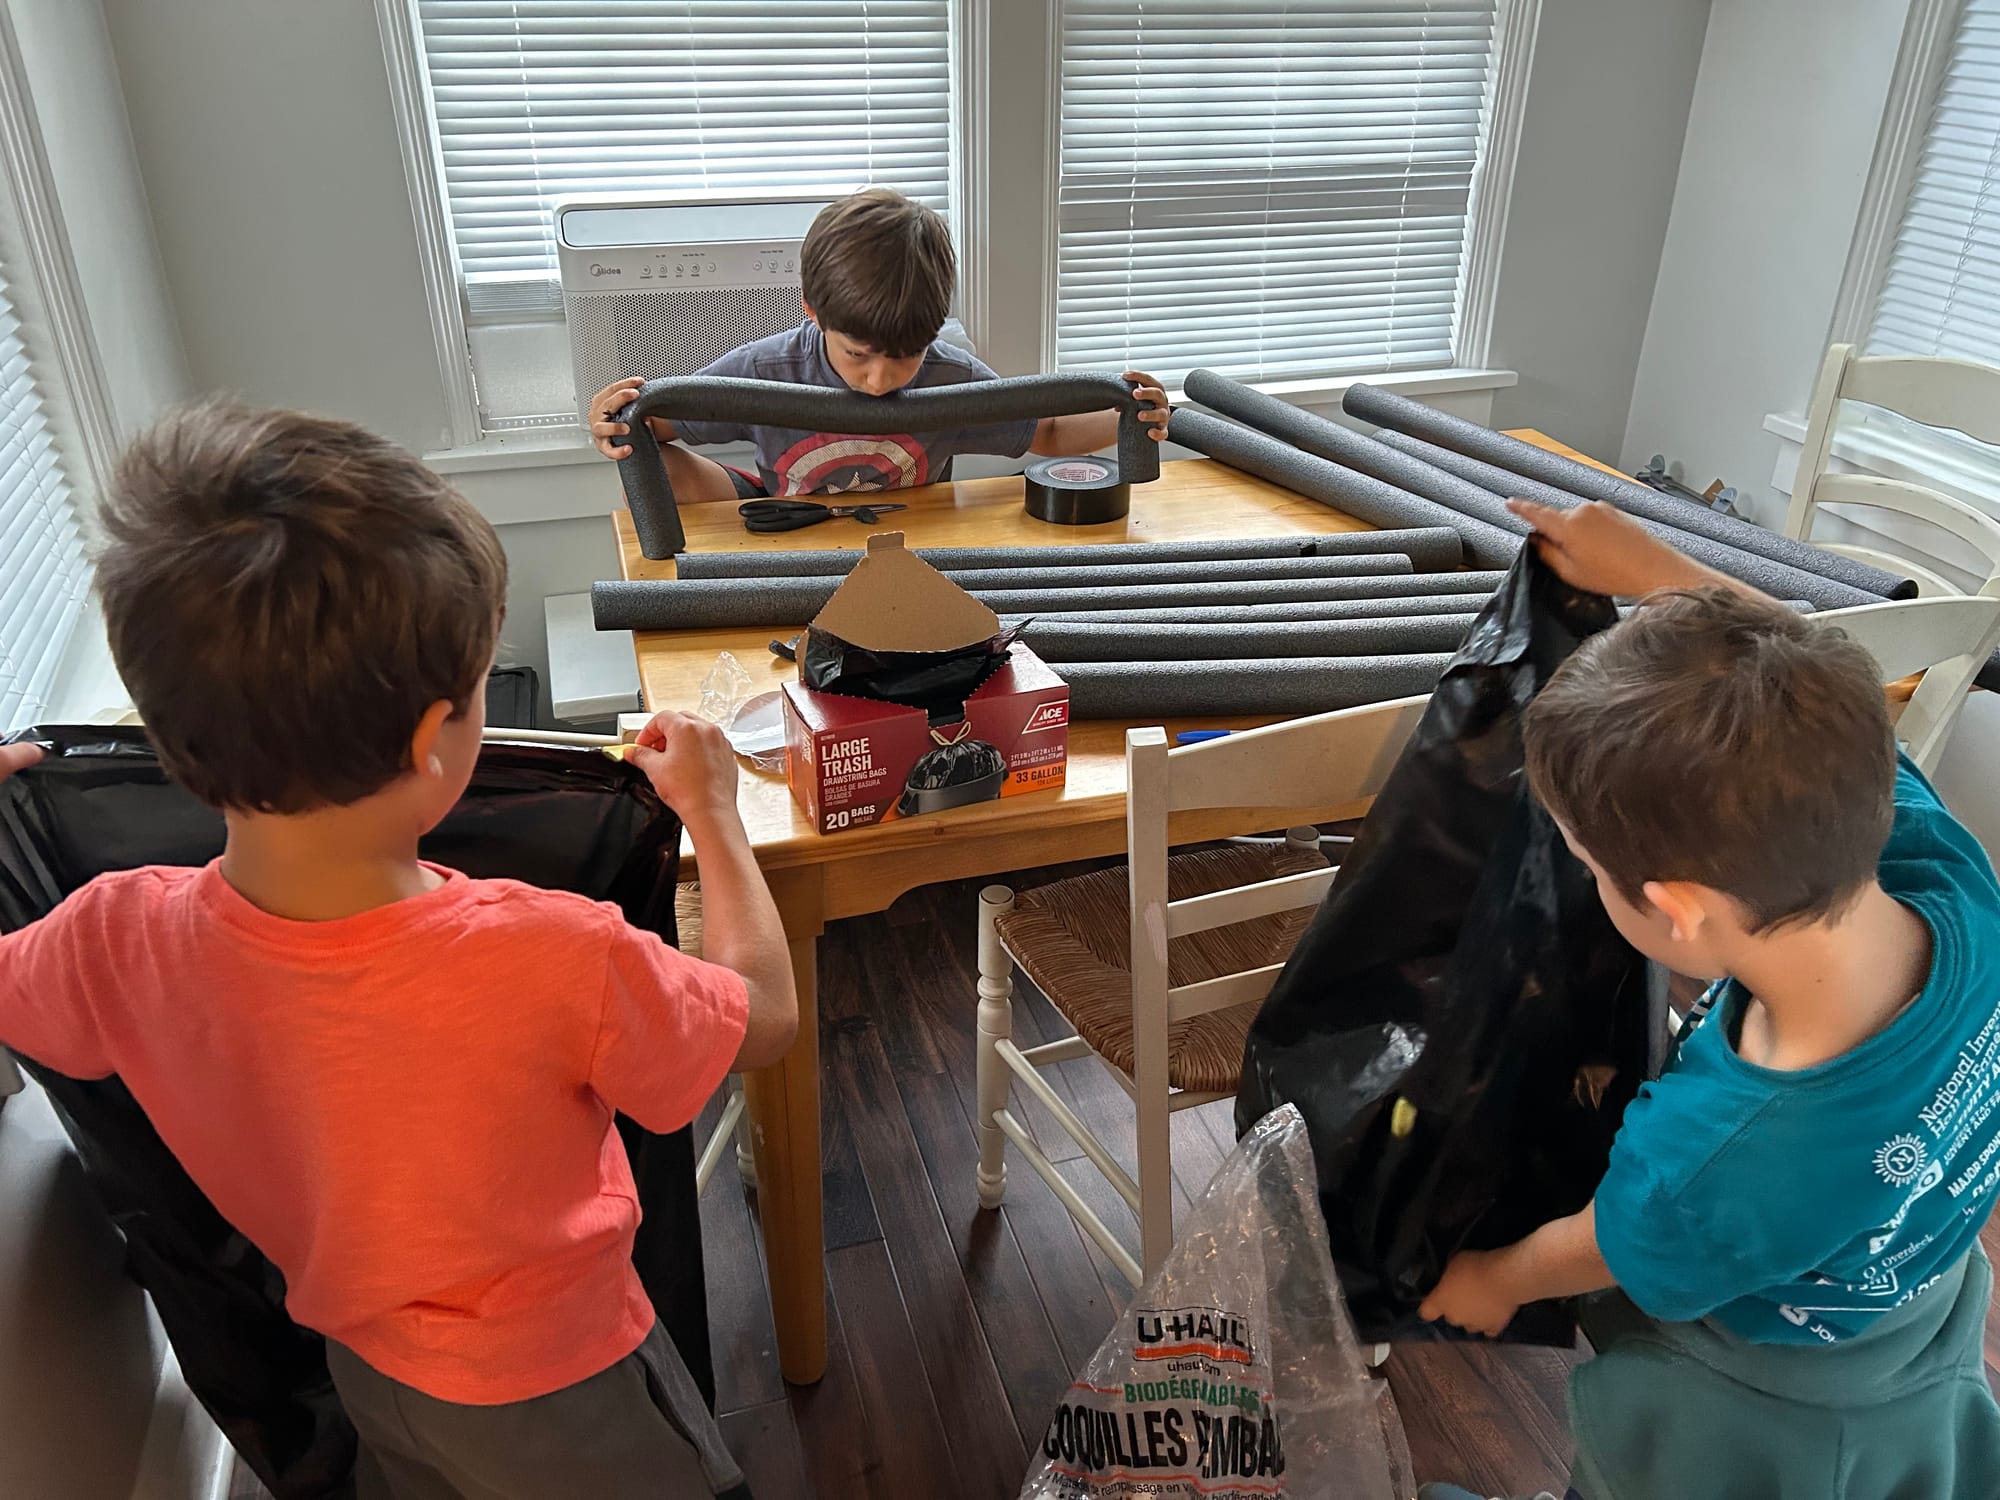
Making Halloween decorations rather than buying them is a lot of fun, and it lets the grandkids put their own creative stamp on the project. There are tons of ideas for Halloween crafts out on the web. This one was inspired by one grandchild who said he wanted to make spiders, and by these instructions, which I simplified for the kids. You'll have to gauge which steps your grandkids can do on their own and which they need help with. (See here about how much to help.)
Materials needed for three spiders:
• 6 6'-8' pieces of black foam pipe wrap
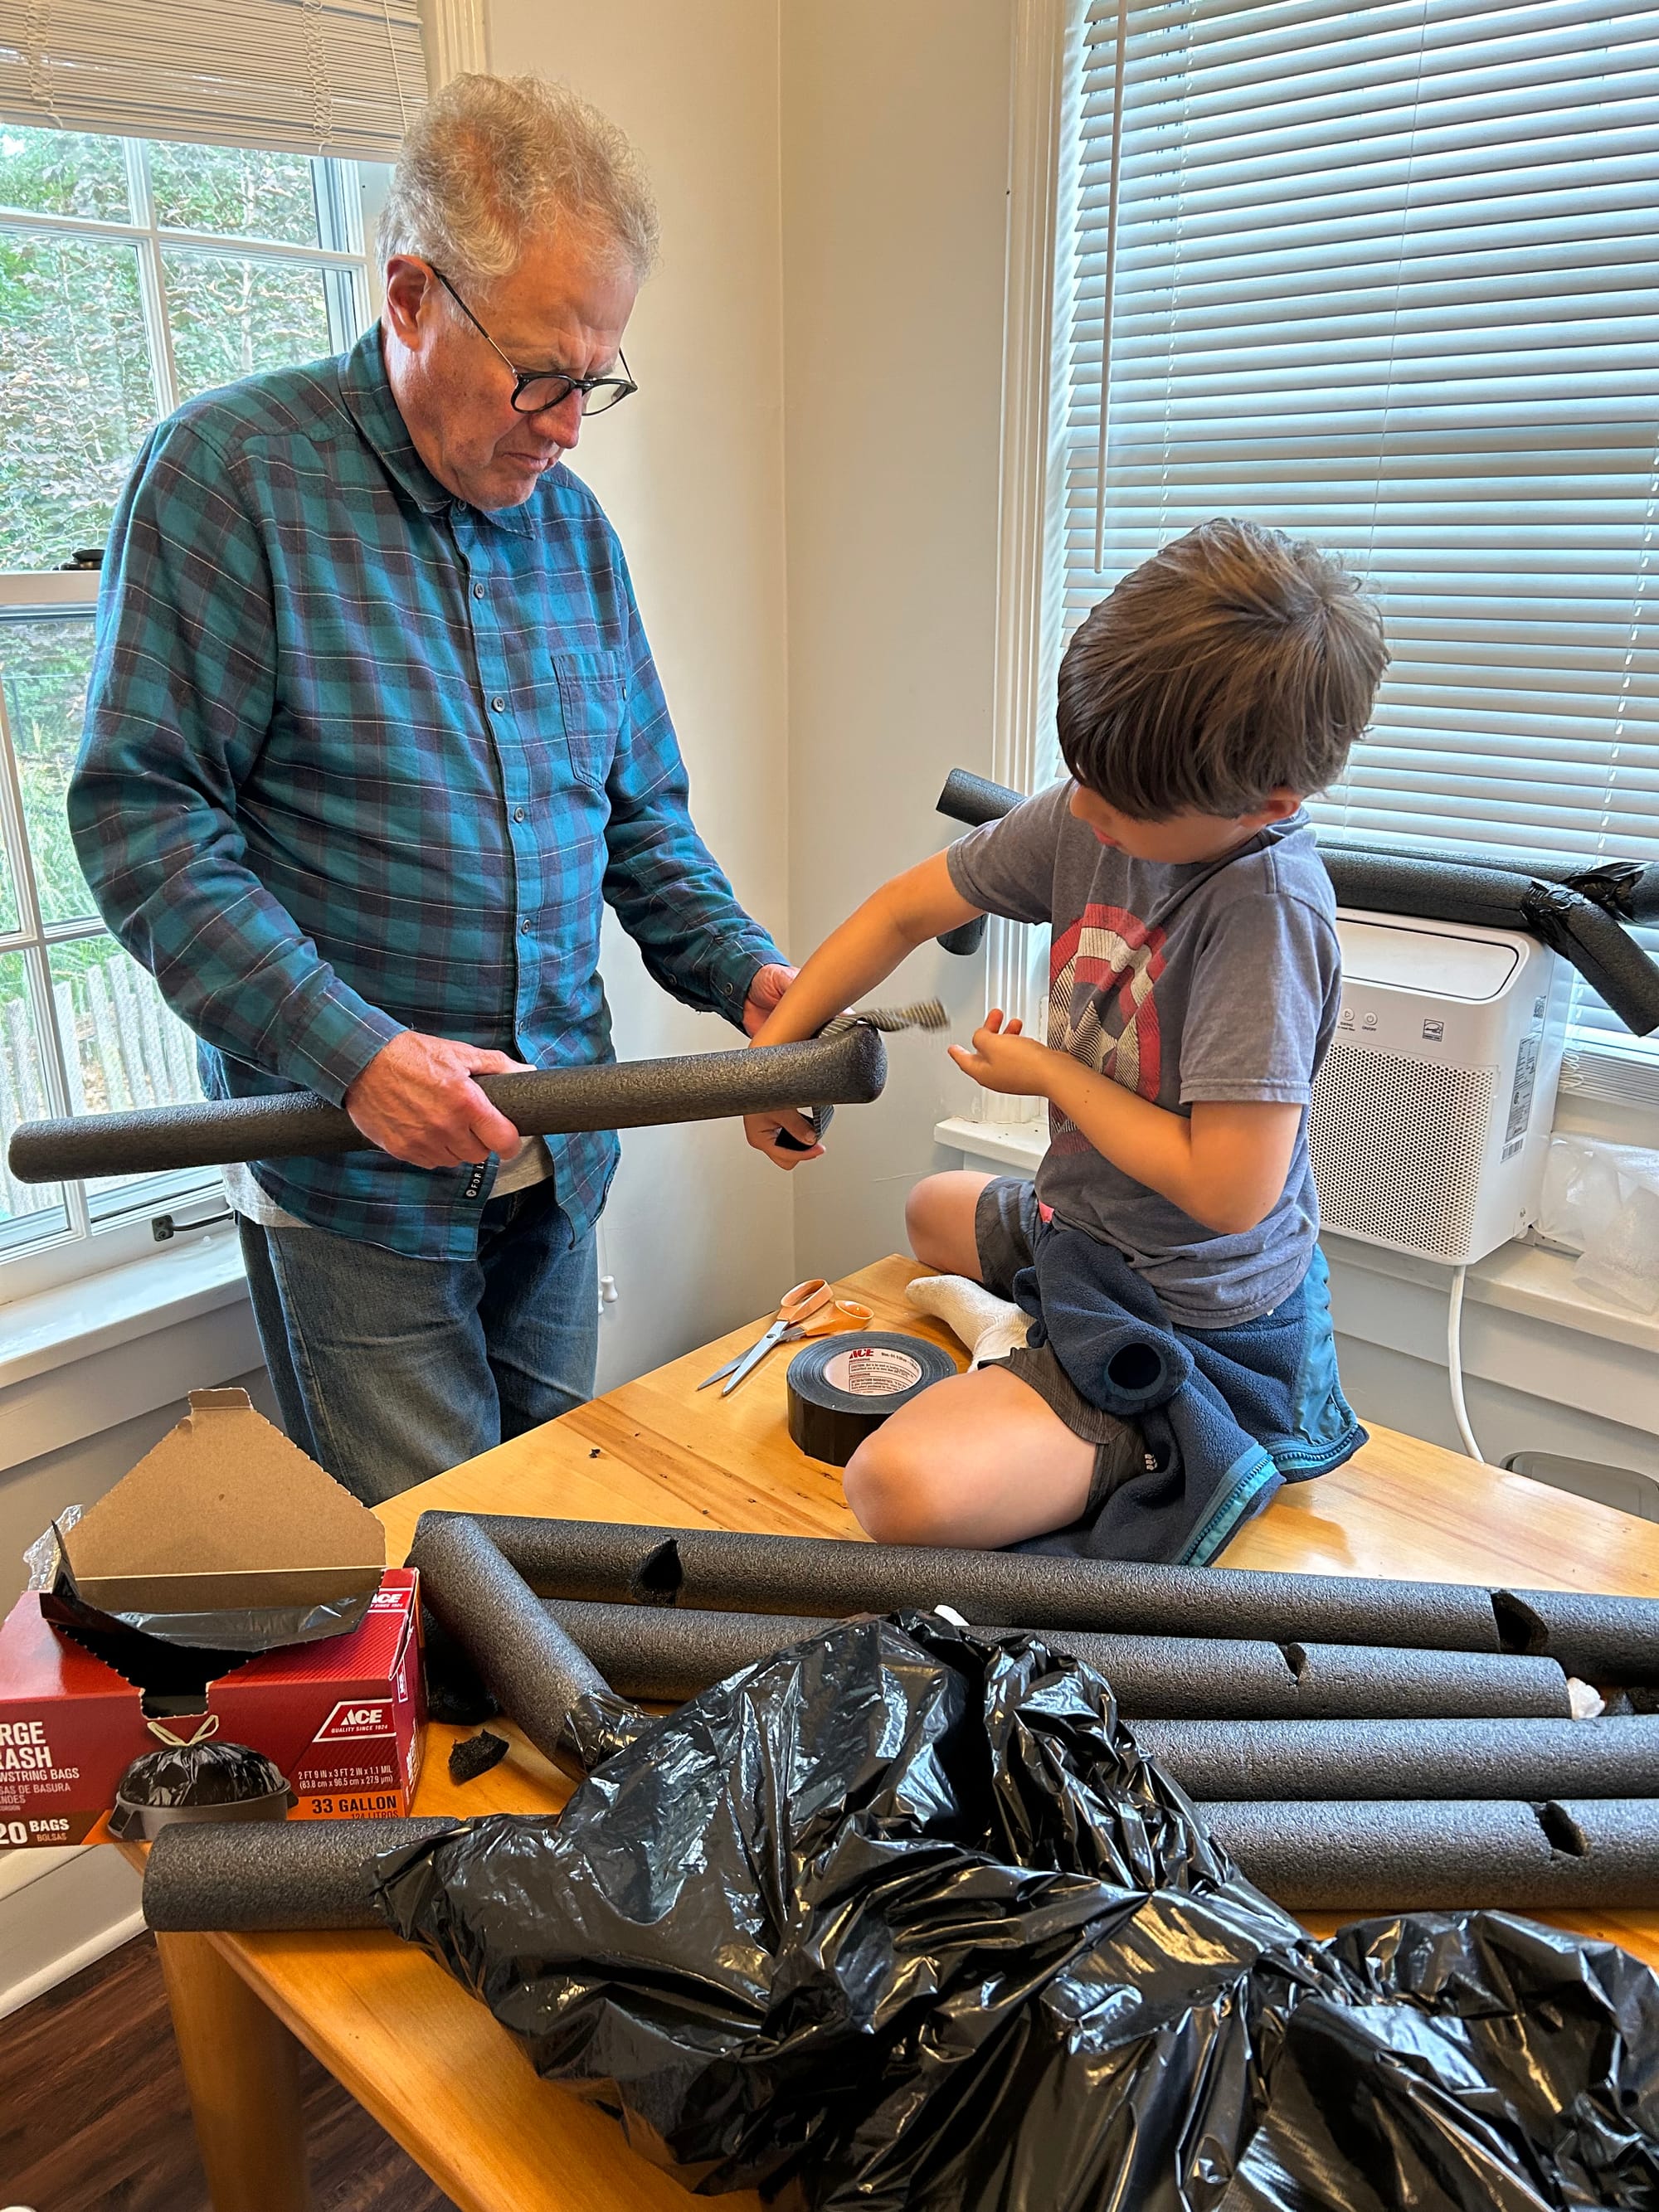
• 1 roll black duct tape (not Gorilla tape—it's too sticky)
• 3 33-gallon black trash bags
• Some kind of fill for the bags (we used a couple old bags of packing peanuts)
• Sturdy scissors
• Dark colored indelible marker
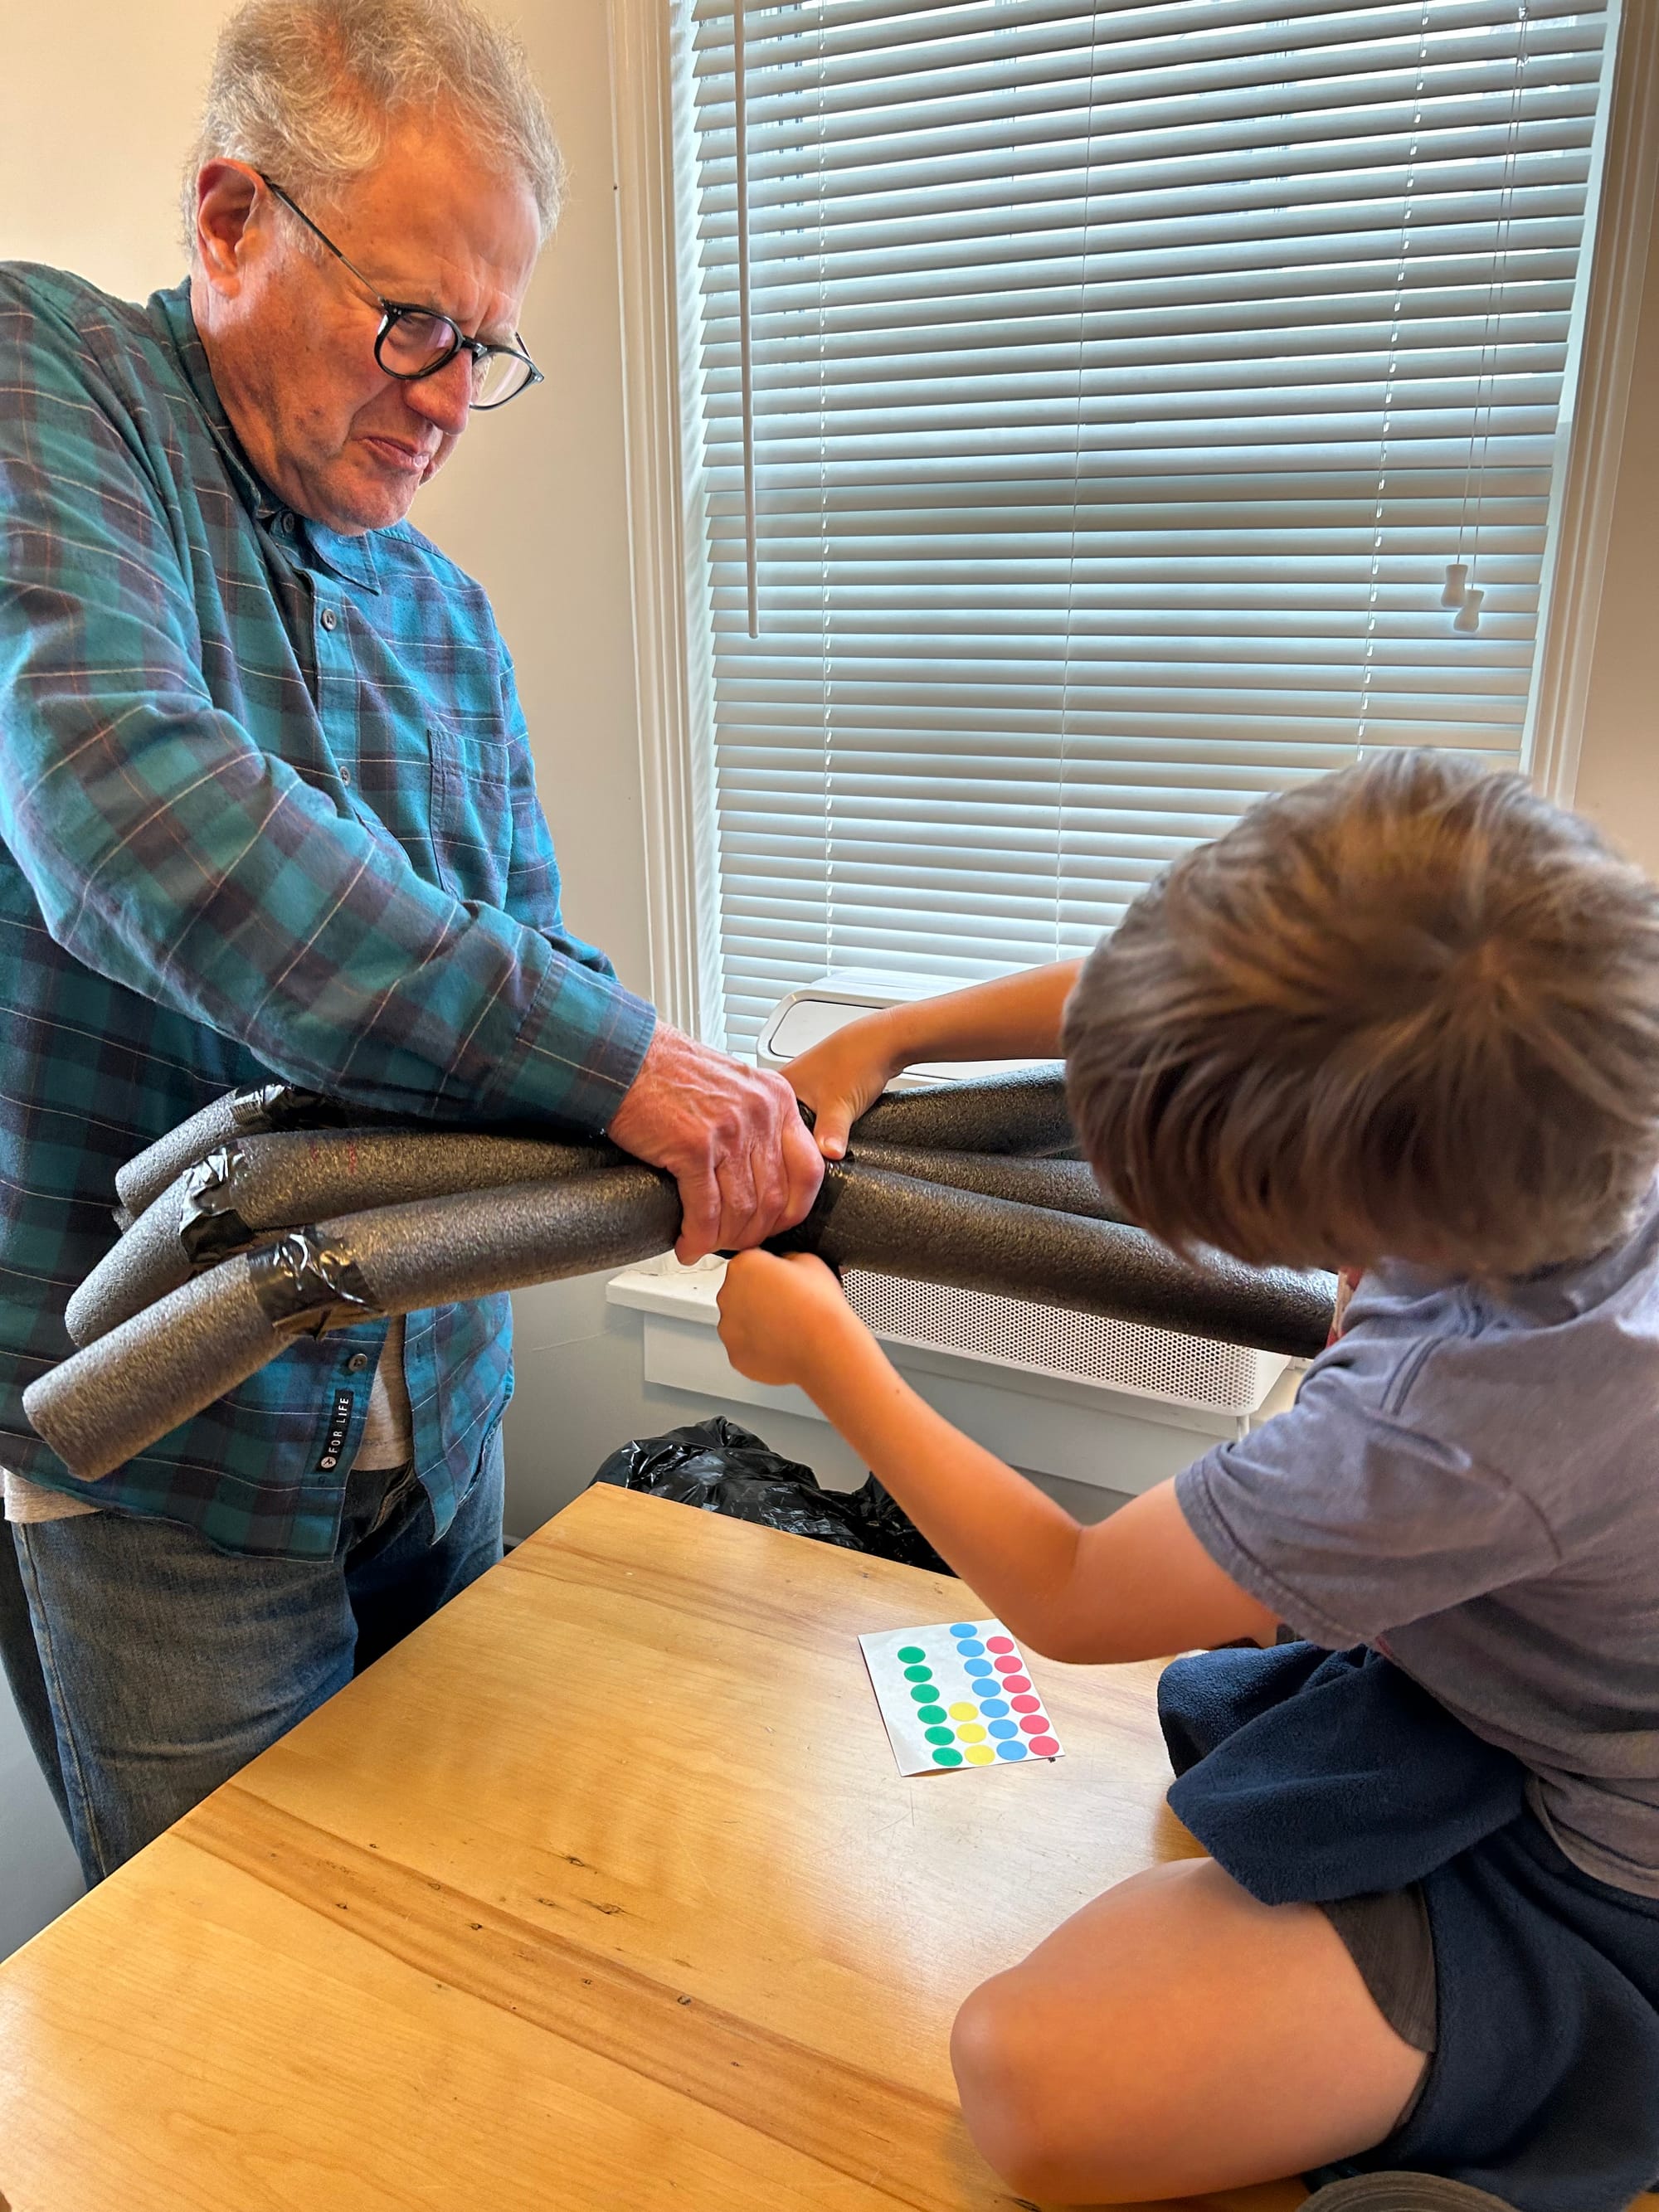
• Optional: Stickers for eyes or other decoration
Step 1: Using scissors, cut each piece of pipe wrap into 2 equal lengths (3'-4' each).
Step 2: Measure and mark 1' from each end of each piece of pipe wrap.
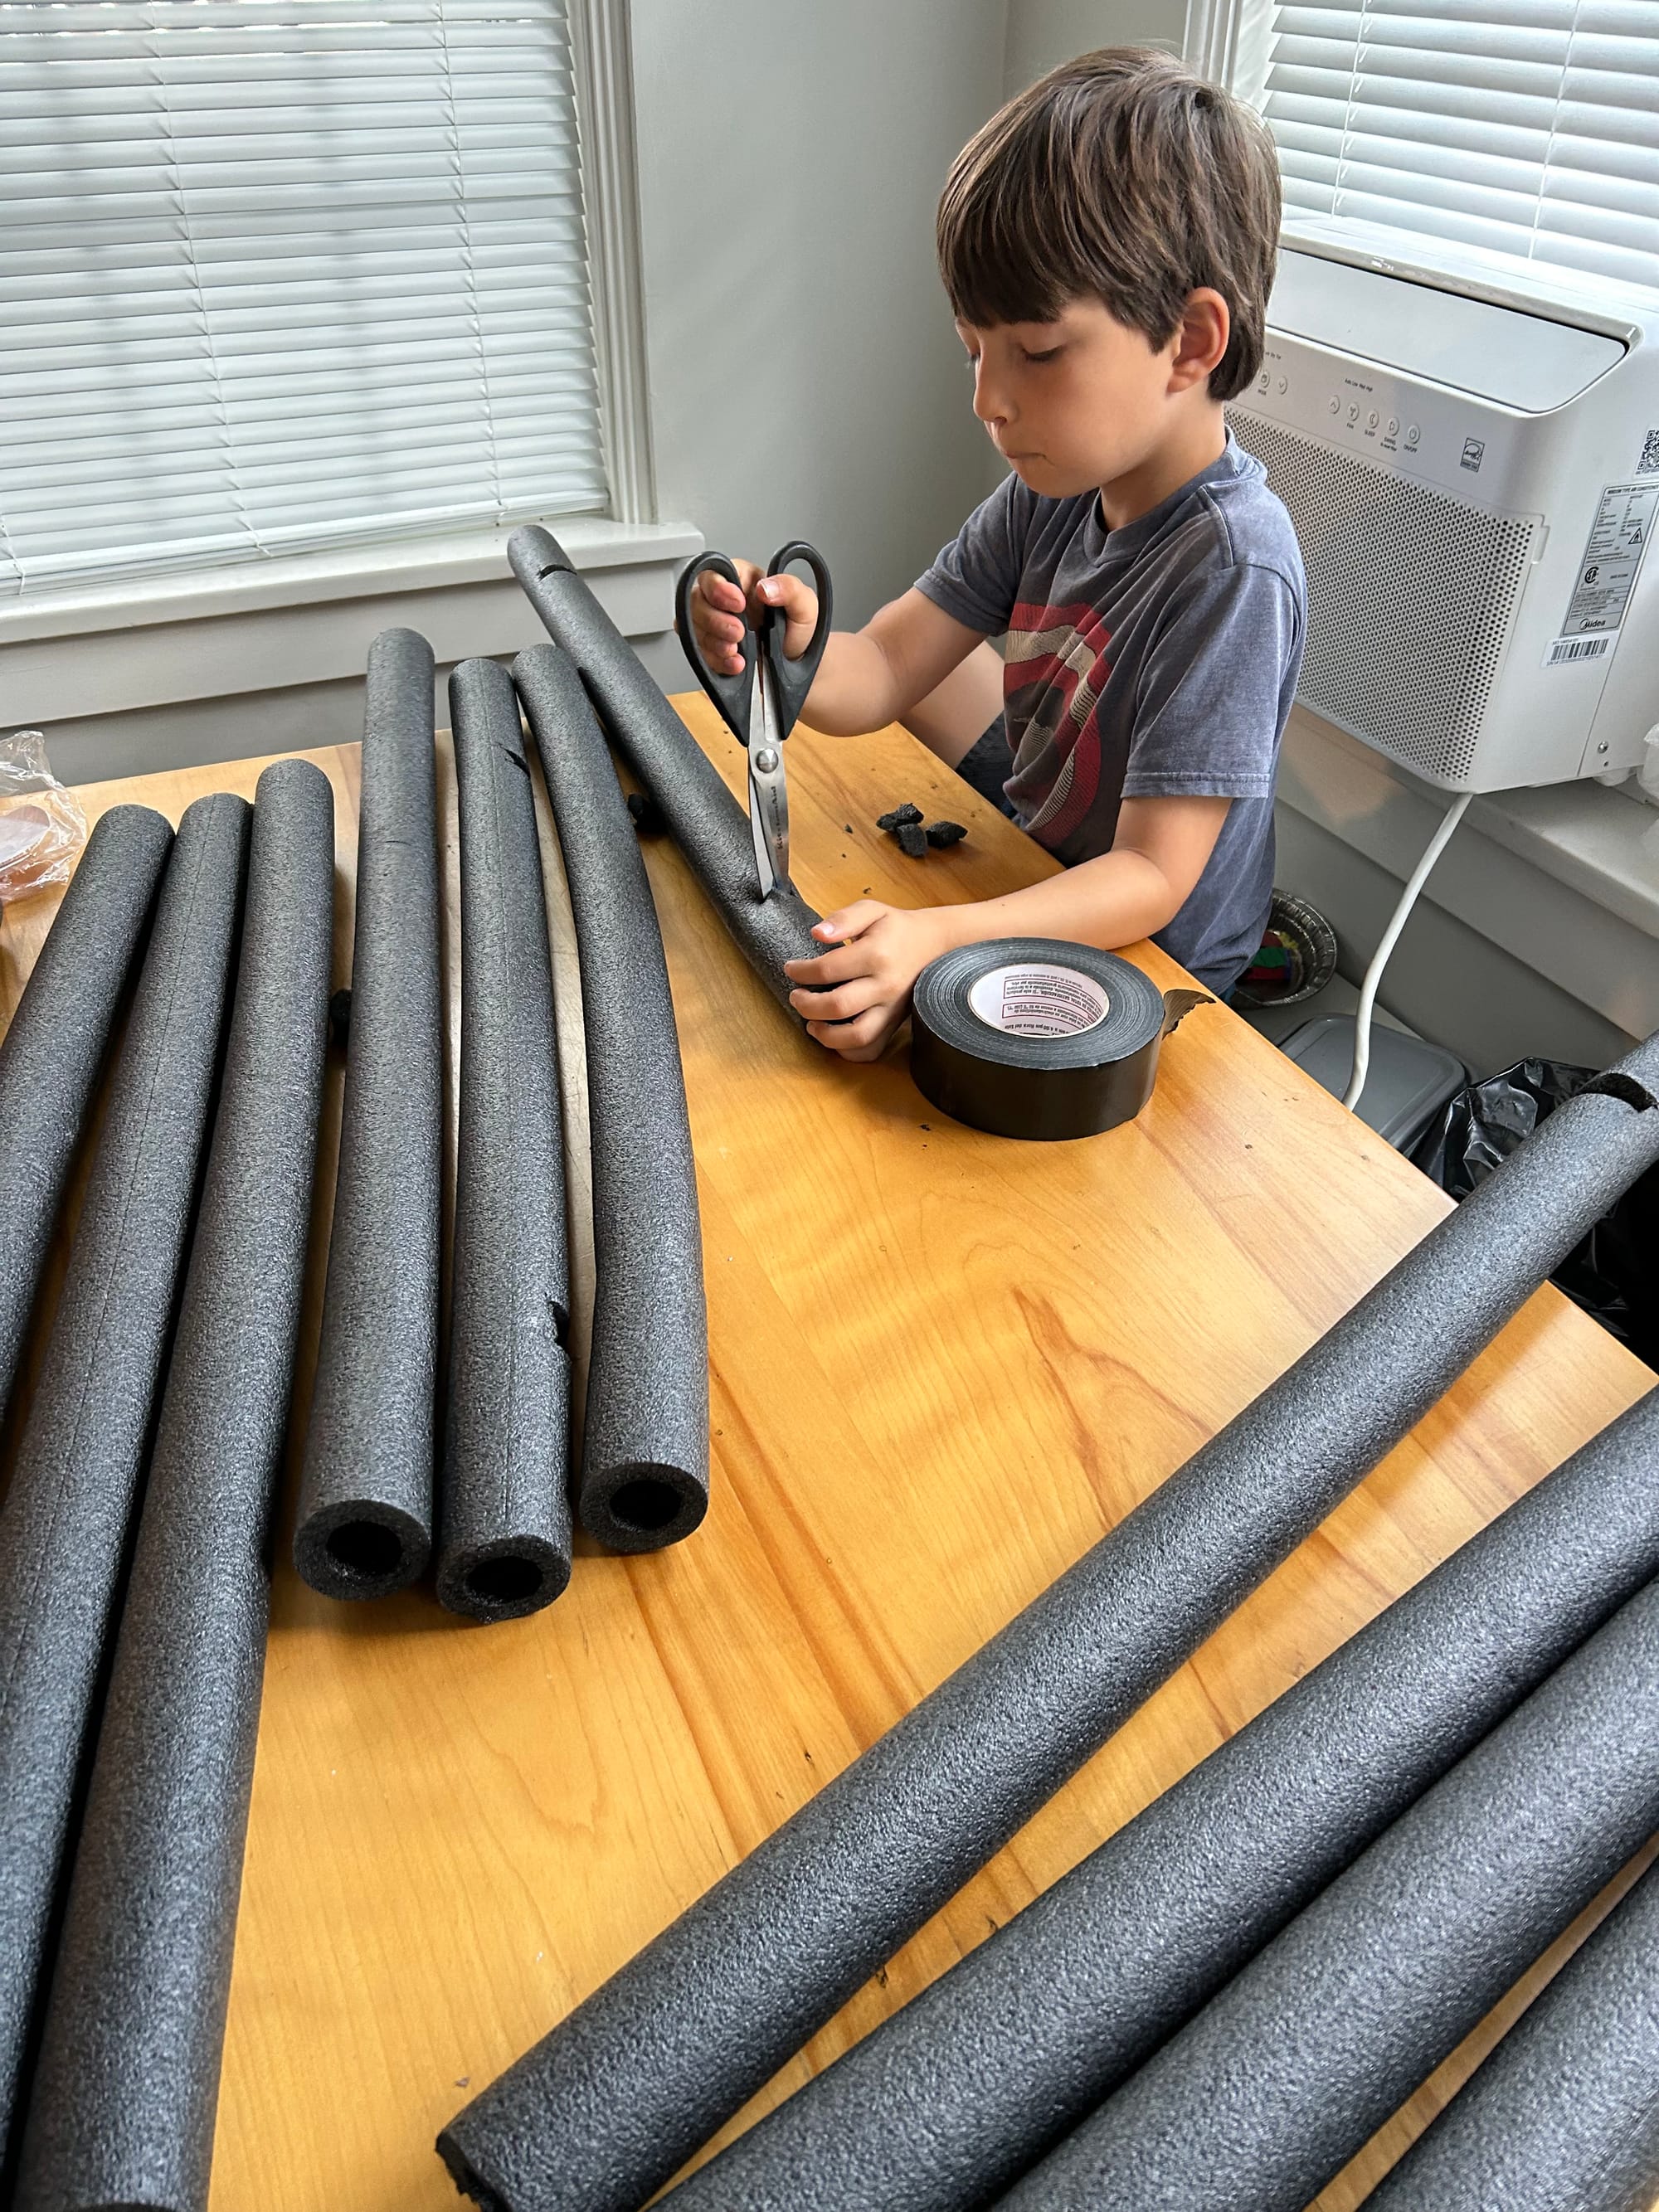
Step 3: Cut a notch at each 1' mark in the pipe wrap (2 notches per length).
Step 4: Fold the pipe wrap at the two notches to make the bends in the spider legs. Secure with duct tape (this step takes a little trial and error.)
Step 5: Squeeze four the pieces of pipe wrap hard and wrap tightly with duct tape. Adjust as needed to get the legs to spread out a little.
Step 6: Fill the plastic bags with packing peanuts or other malleable filler.
Step 7: Mold the bag to make a smaller head end and a larger body end. Secure the shape with duct tape.
Step 8: Add eyes or other decoration now or after the next step. Our grandkids wanted 8 eyes (as is typical for spiders), smiles (not so typical), and mandibles. The last they crafted by cutting a 3/4" or so round off the end of a leg. Pipe wrap has a split. The donut shaped piece opened at the split, so when taped tightly opposite the split, the mandibles opened.

Step 9: Attach the body and legs together with duct tape.
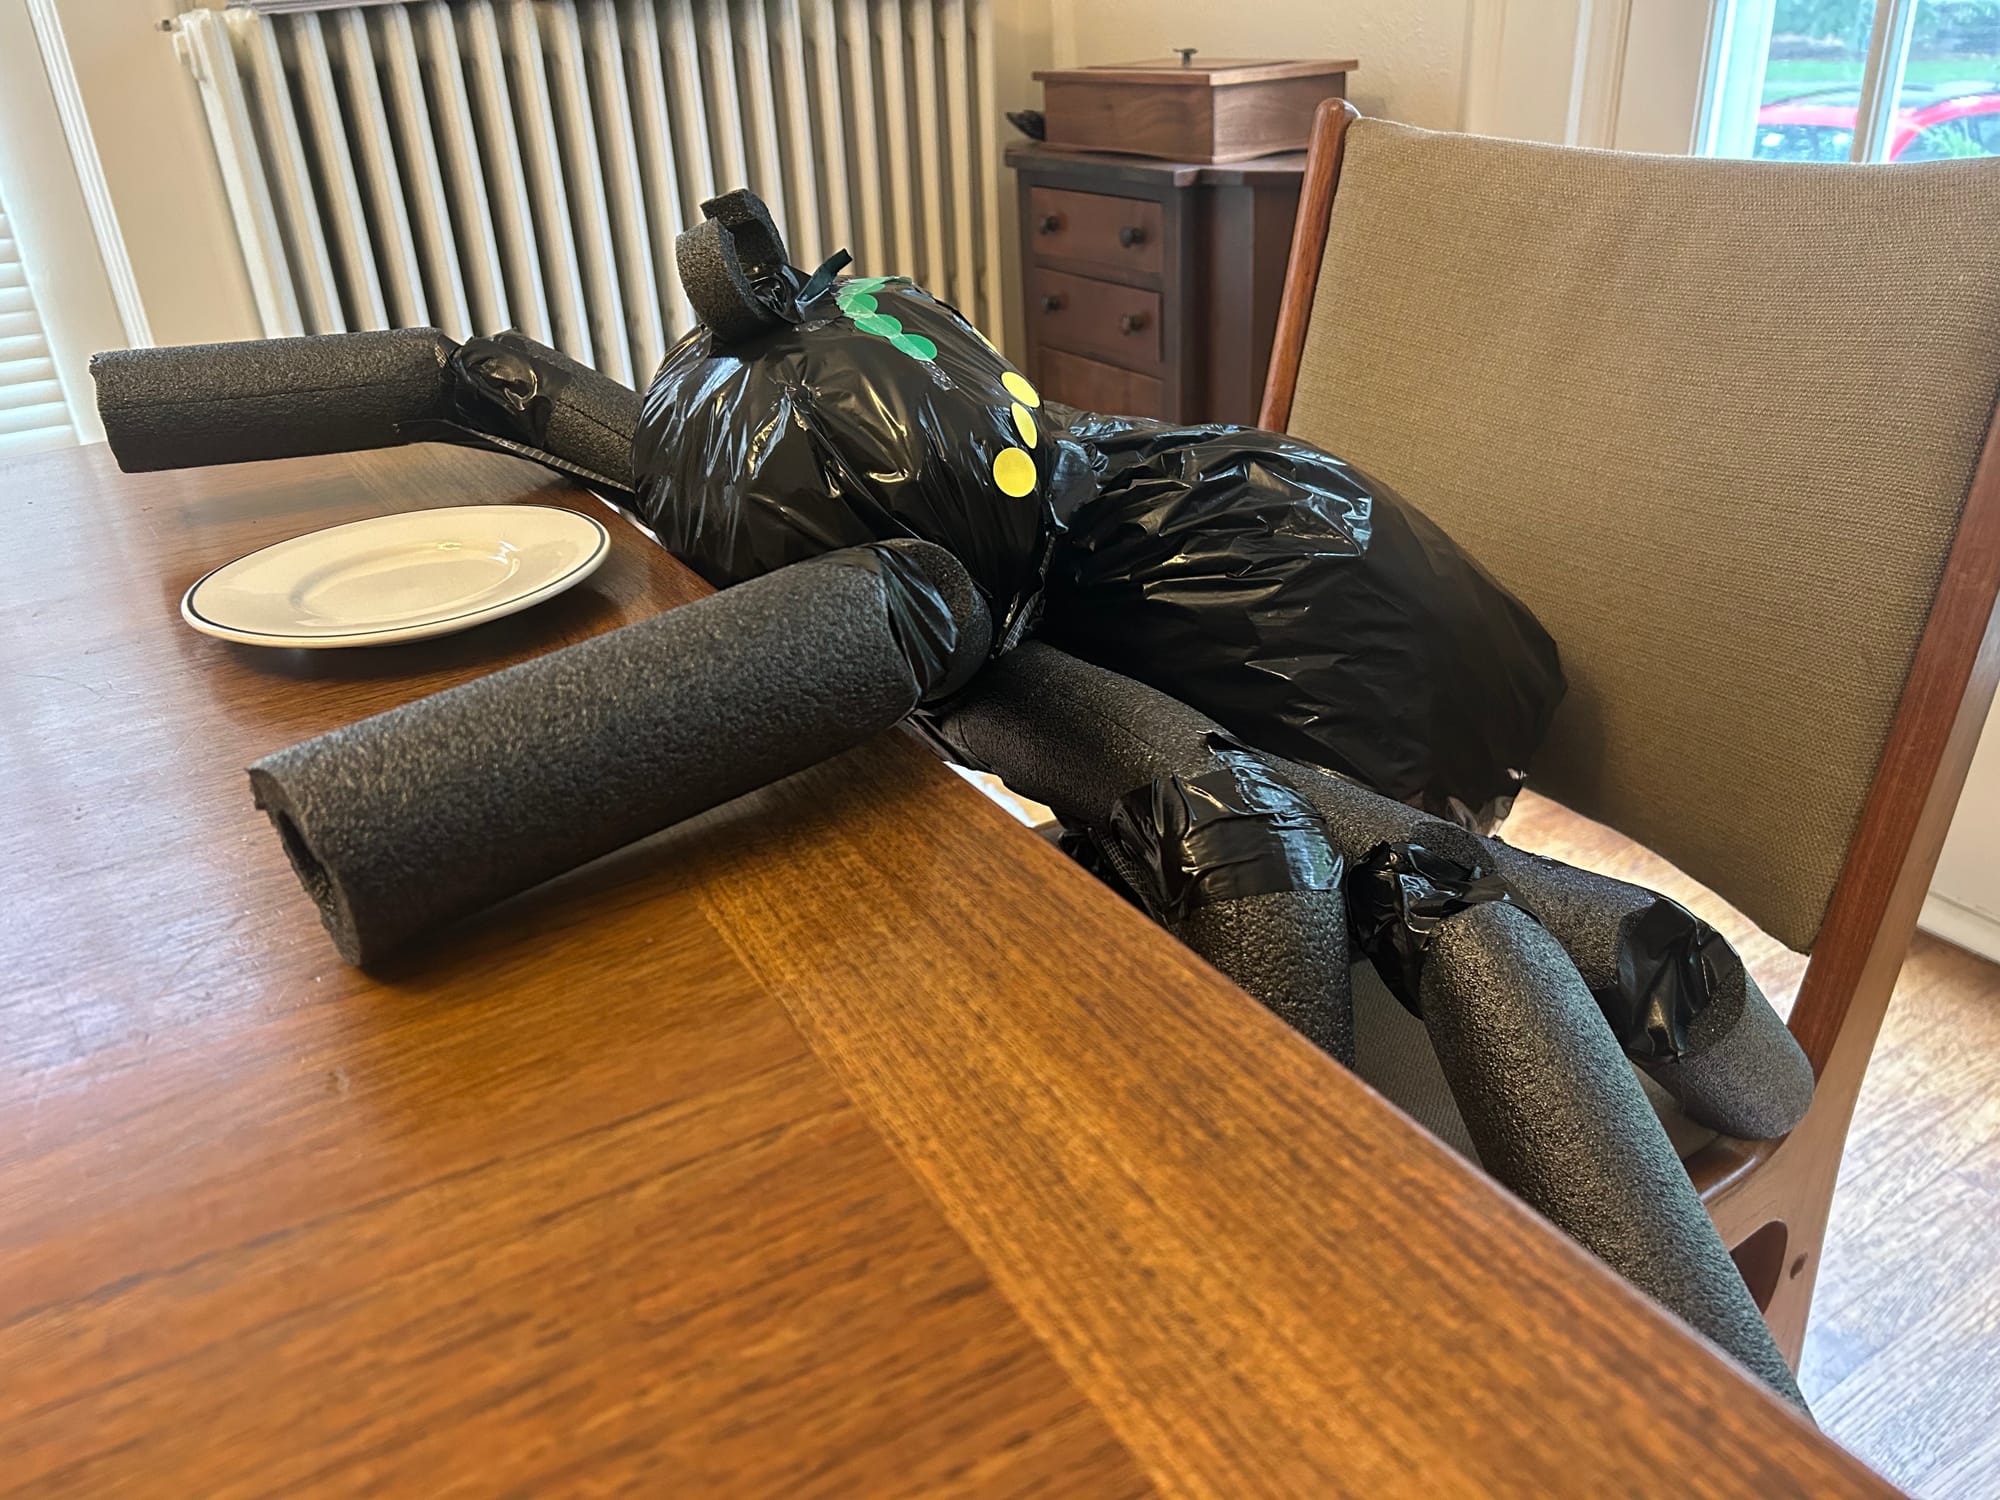
Step 10: Invite the spiders to lunch.