Thanksgiving fun: Pinecone turkeys
Do you remember helping with Thanksgiving preparations growing up? I was my grandmother’s chief gravy tester, and after my mother took over preparations, I ironed placemats and napkins. Ironing and table setting were on our kids’ lists, too—along with cleaning their rooms, dusting, etc., etc.—and as our daughter’s artistry and design skills flourished, she took over on centerpieces. The adult offspring remind me this wasn’t all fun, although they do have some positive association with getting the fancy silver, placemats (etc.) out. As a grandparent, I can give the grandchildren ways to participate that give a sense of contribution, membership, and excited anticipation—and they don’t have to help with the vacuuming.
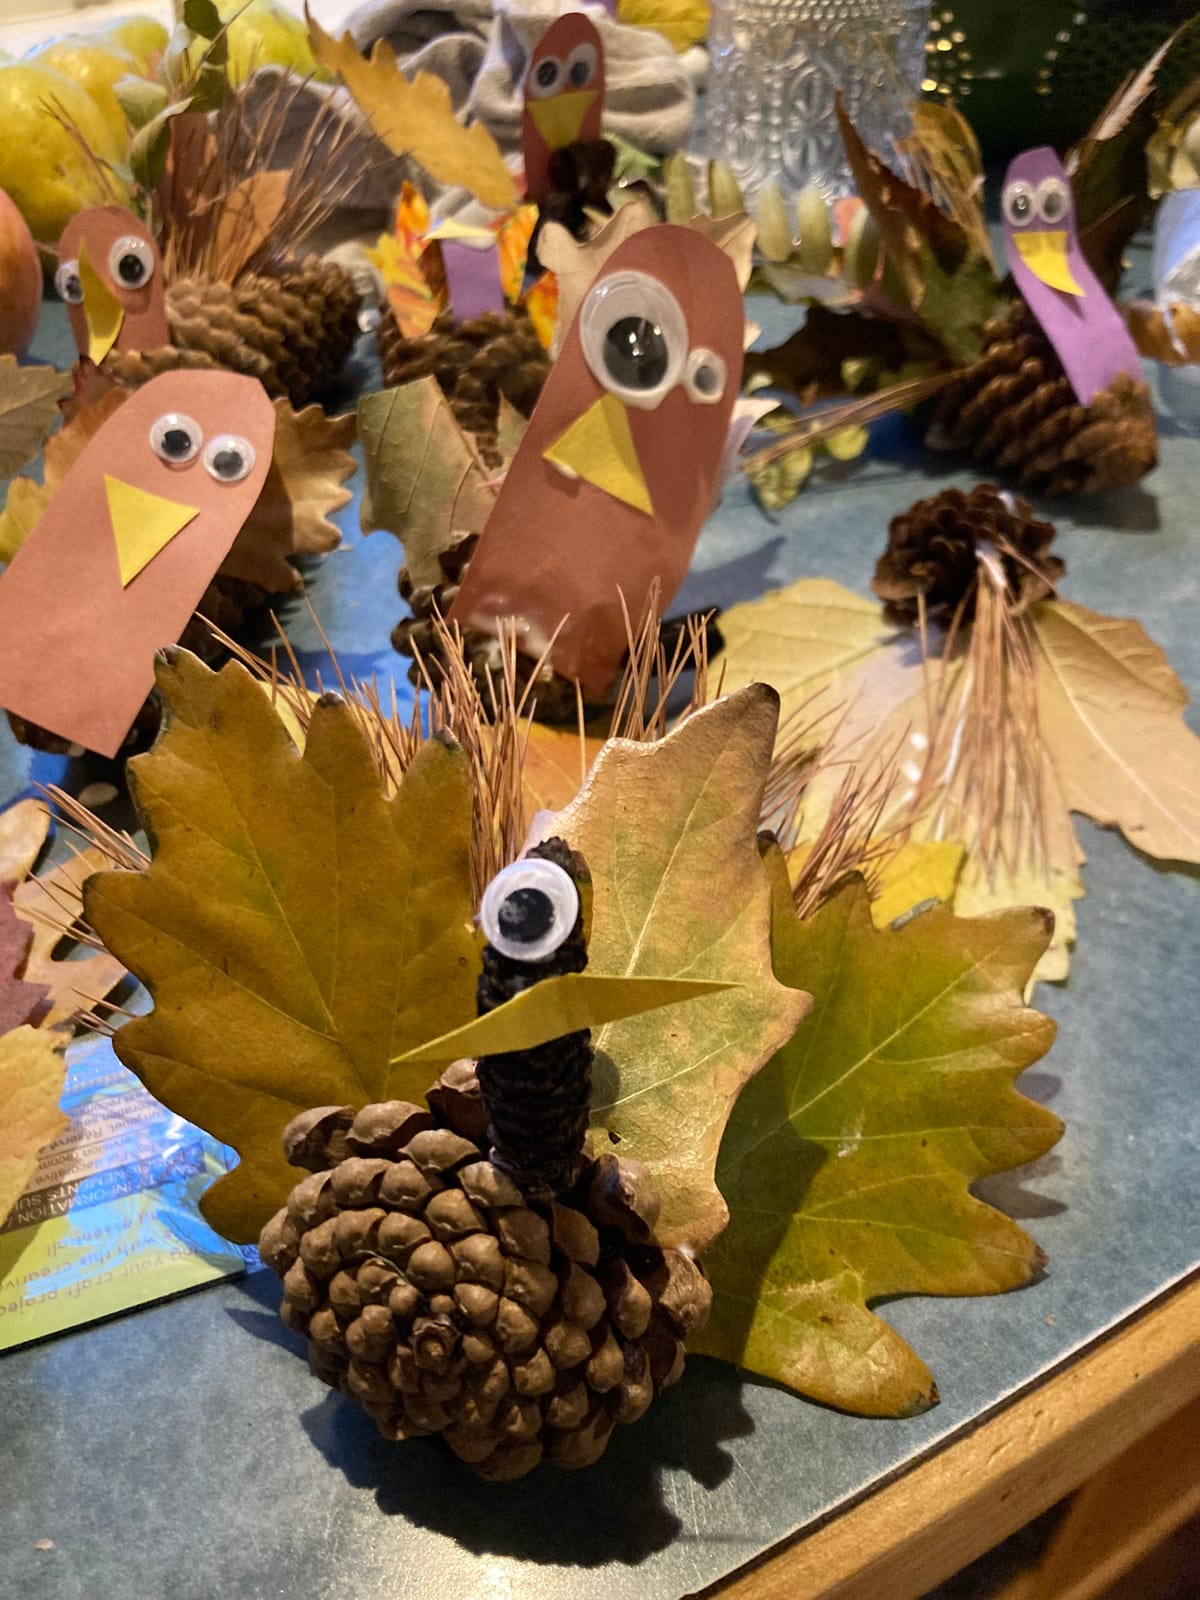
Helping with decorations is a great focus, in part because it is fun, and in part because the results are highly visible to be enjoyed and remarked on by all. One way we’ve done this is by making pinecone turkeys. The handiwork can be used part of a centerpiece, to hold place cards, or as part of a decorative display. And the project is easy, inexpensive, and adaptable to various degrees of creative sophistication and manual dexterity, preschool to adult.
If you can, make gathering materials—especially pinecones and leaves—part of the fun. You’ll need:
• Pinecones with open scales, for tucking in the decorations. Any size or shape will work.
• Something to make tail feathers—options include:
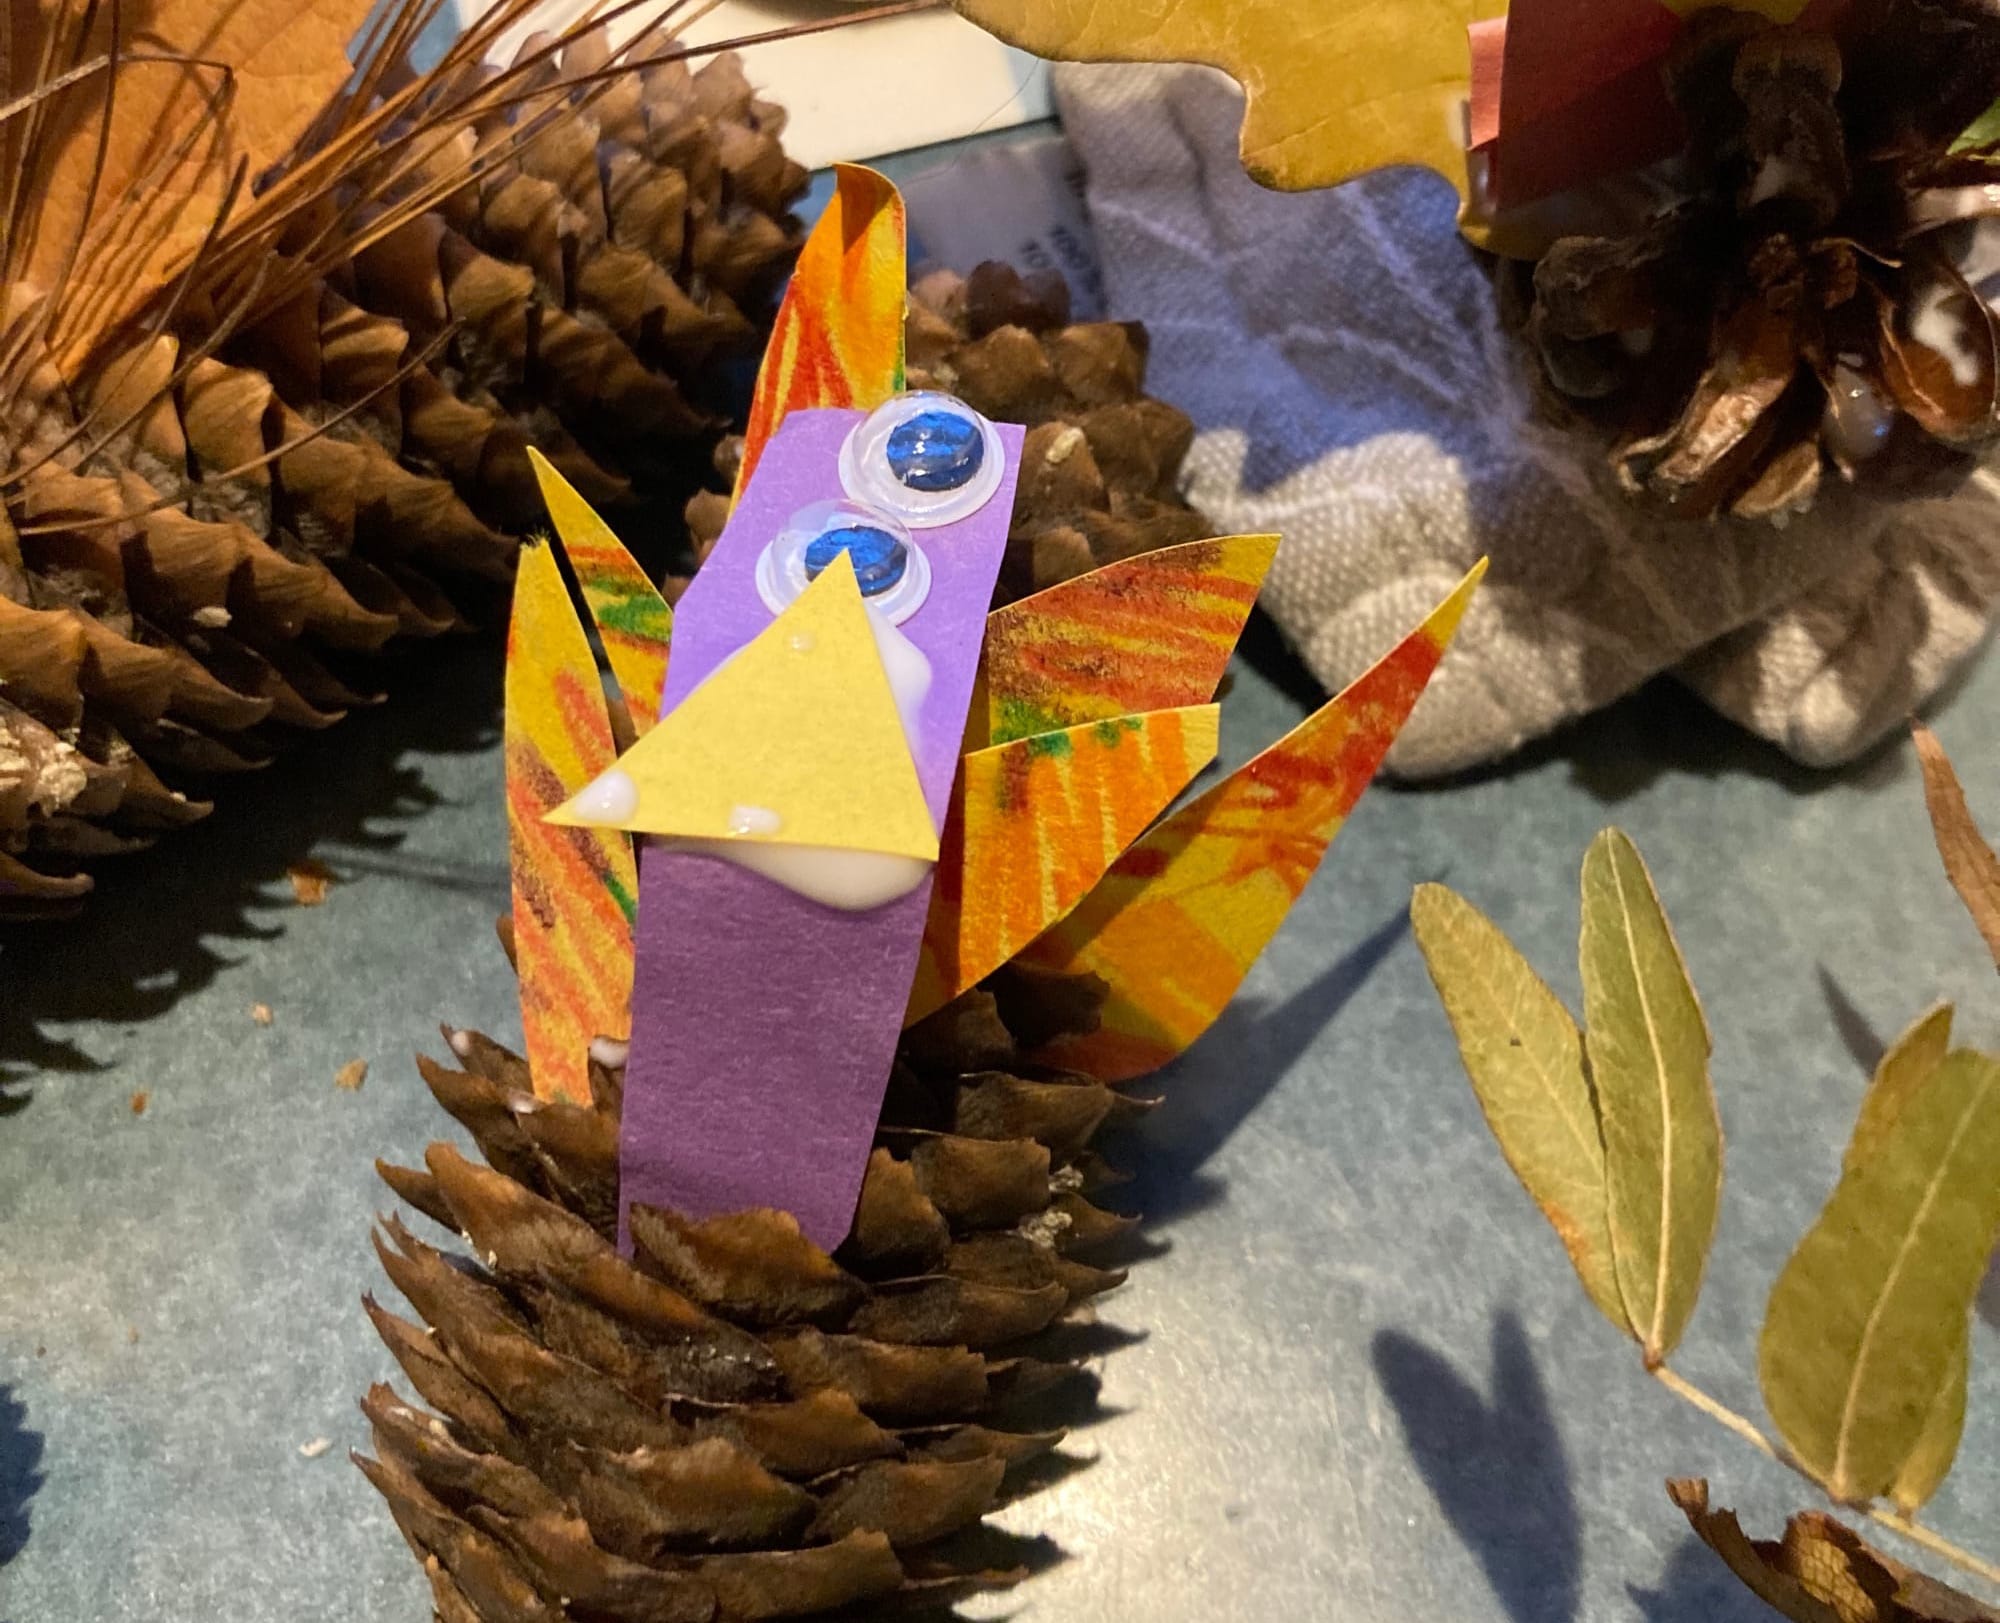
Construction paper in various colors, cut to feather shapes in a scale appropriate to the type(s) of pine cone you have. If you want to get fancy, you can crease the cut-out feathers by folding them in half vertically, then unfolding before you insert them—you end up with a shaped and more realistic-looking tail feather. NOTE: Remember you can cut more than one feather at once if you fold the paper in halves, thirds, quarters, even a fan!
Construction paper in various colors, decorated with crayon or markers. You can decorate individual “feathers” with more or less elaborate designs. Or use a simplifying trick (thank you, Britt Hvinden!): Scribble bright colors on a full sheet of construction paper, then cut out the feathers. (See also NOTE above.)
Fallen leaves (real ones) in various shapes, sizes, and colors
Fallen pine needles
• Construction paper or thin cardboard to make the head/neck and beak. Cut out the head/neck in a thumb shape (rounded top) scaled in size to your pinecones. The beak can be a simple triangle, or you can cut a diamond shape, which you fold across the narrower two points to create an open beak shape. (See also NOTE above.)
• Googly eyes in various sizes (for scale, given the range in pinecone sizes)
• Glue
• Scissors
After you have assembled the materials, go to it! The basic steps are these:
- Insert a head/neck between scales on one end of a pine cone, gluing it to secure it.
- Glue a beak on the head/neck.
- Glue googly eyes on the head/neck.
- Insert the tail feather material(s) of your choice between scales at the end of the pinecone opposite the head/neck; glue the “feathers” in place.
- Set the completed turkeys aside to dry thoroughly.
- Get the grandkids’ help with adding them to centerpieces, place settings, or elsewhere as works for your family and space.
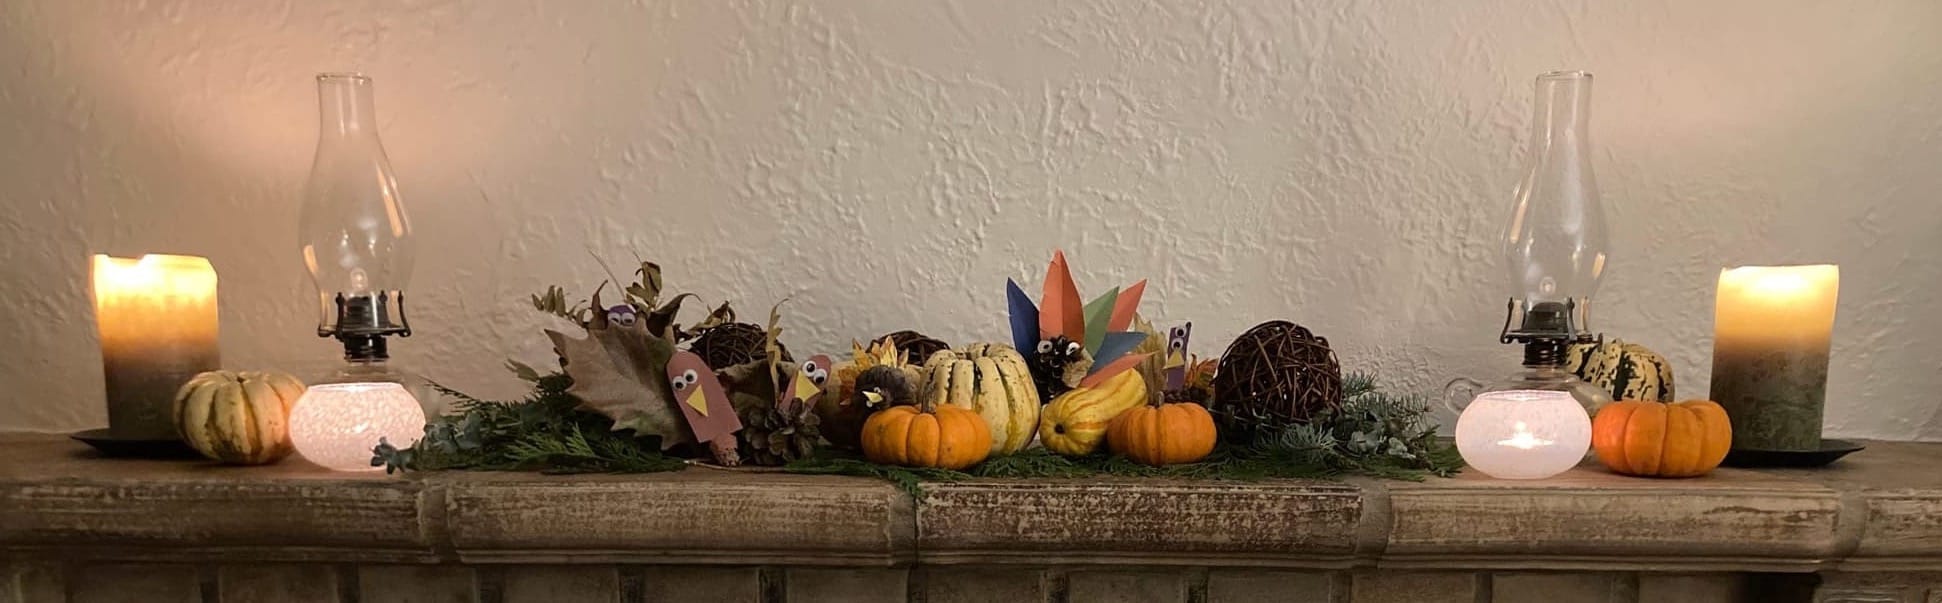
Much of the fun of this project is that pinecones come in many different shapes and sizes, and the materials can be mixed and matched, so you can end up with quite a variety of turkeys—reflecting the style and personality of each crafter. Especially their sense of humor!
In times of stress and change, it’s especially sweet to have family for comfort and mutual support. Wishing you and yours a Happy Thanksgiving.